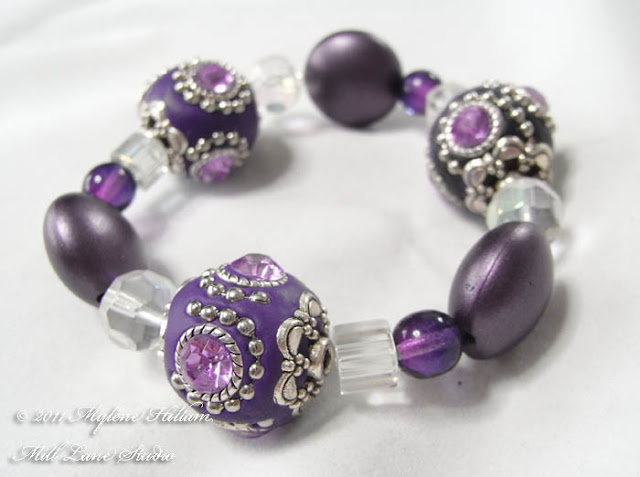
Stretch bracelets are a beginner-friendly way to jump into the world of jewelry-making. No tricky clasps, no metal findings—just beads and elastic. But while stringing the beads is the easy part, the true challenge lies in one sneaky little detail: tying a knot that doesn’t unravel.
If you’ve ever had your favorite elastic bracelet snap or slip apart, you’re not alone. In this guide, you’ll learn how to craft a durable stretch bracelet and—most importantly—how to secure the knot so it doesn’t come undone over time. Let’s get crafting!
🛍️ What You’ll Need to Make a Stretch Bracelet
Before diving in, gather your supplies. Here’s a simple list to get you started:
- Elastic beading cord (1mm Stretch Magic is ideal)
- Statement or focal beads (like Kashmiri, gemstone, or acrylic)
- Spacer or filler beads
- Scissors
- Bead stopper (highly recommended!)
- Jewelry glue (like G-S Hypo Cement)
Pro Tip: Always use the thickest elastic cord that fits through the smallest hole in your bead set. This ensures the bracelet stays strong and doesn’t stretch out too quickly.
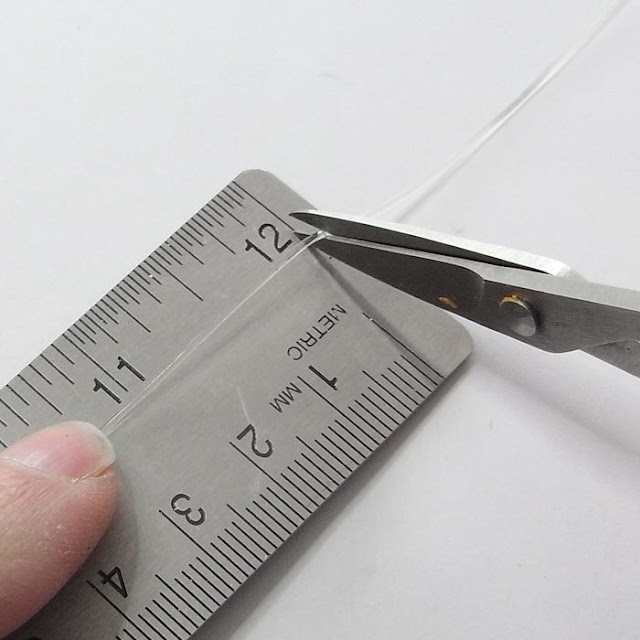
📏 How Long Should Your Cord Be?

For most adult wrist sizes, a 12-inch (30 cm) length of elastic will do the trick. Add an extra 4 inches (10 cm) just in case—you’ll need the extra slack when tying your knot.
🔄 The Secret Step: Pre-Stretch the Elastic
Don’t skip this! One of the most common issues with elastic jewelry is overstretching. After several wears, the bracelet starts to sag or even fall off.
To prevent that:
- Hold each end of your elastic cord.
- Gently stretch it 3–4 times before you start stringing beads.
This “pre-stretching” helps your bracelet keep its original shape after being worn multiple times.
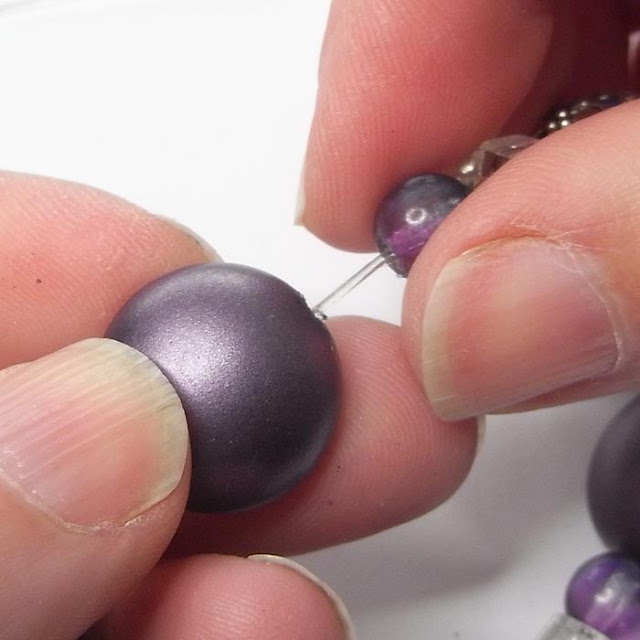
📿 Stringing Your Beads
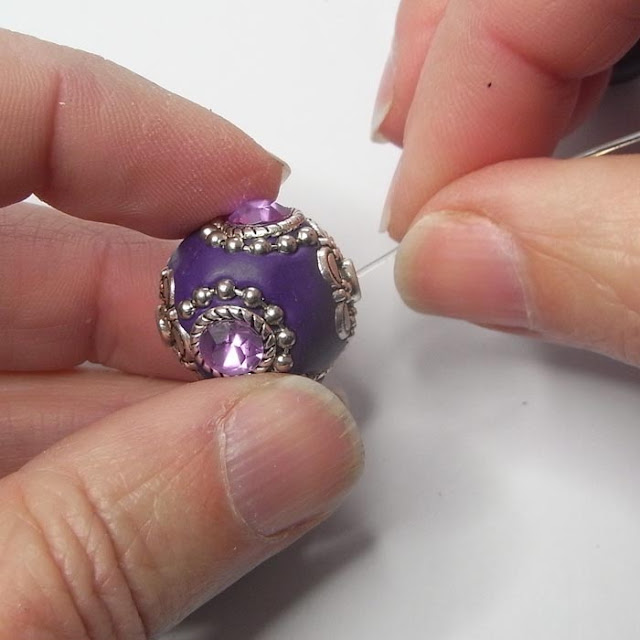
This is the fun part! Lay out your beads in your desired pattern before threading them onto the cord. This helps you see how the design will look before committing.
Follow these steps:
- Place a bead stopper on one end of your elastic to avoid accidental spills.
- Begin threading your beads one by one.
- Make sure either the first or last bead has a larger hole—this will allow you to hide your knot later.
Design Tip: Mix bold focal beads with neutral filler beads for a balanced look.
🔐 How to Tie a Stretch Bracelet Knot That Won’t Slip
Tying the knot is the trickiest (and most crucial) part of making a stretch bracelet. Here’s a step-by-step breakdown of the most secure method:
Step-by-Step Knot Instructions:
- Remove the bead stopper.
- Wrap one end of the elastic over the other and tie a simple overhand knot (this is your base).
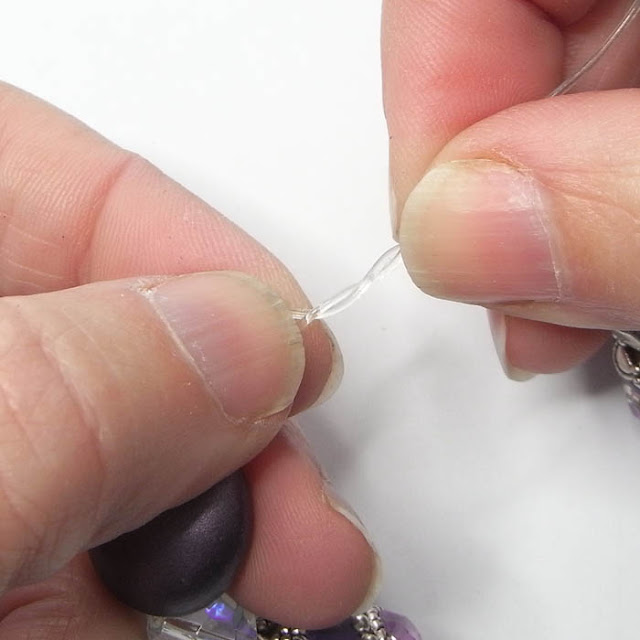
- Repeat to create a double knot.
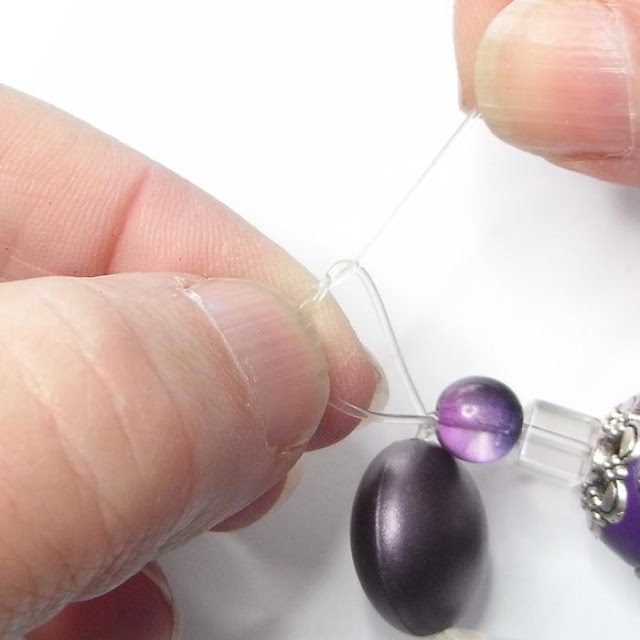
- Pull the knot tight—but not so tight that the elastic distorts.
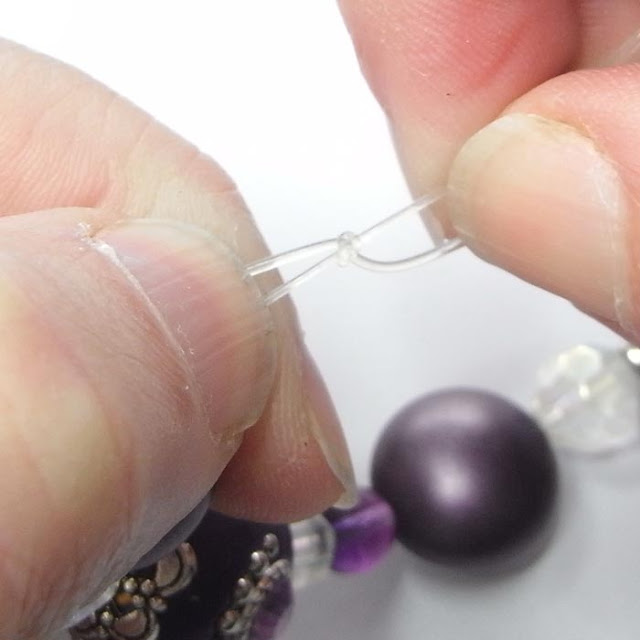
- Add a third knot for extra security.
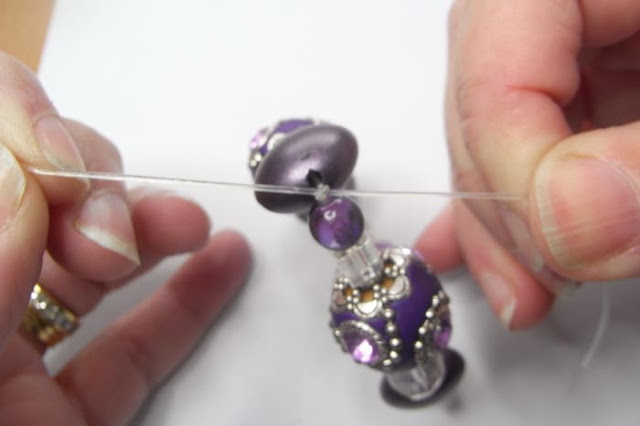
- Apply a drop of glue (like G-S Hypo Cement) directly to the knot. Let it dry completely.
- Trim the excess elastic, leaving about ¼ inch (6 mm) on each end.
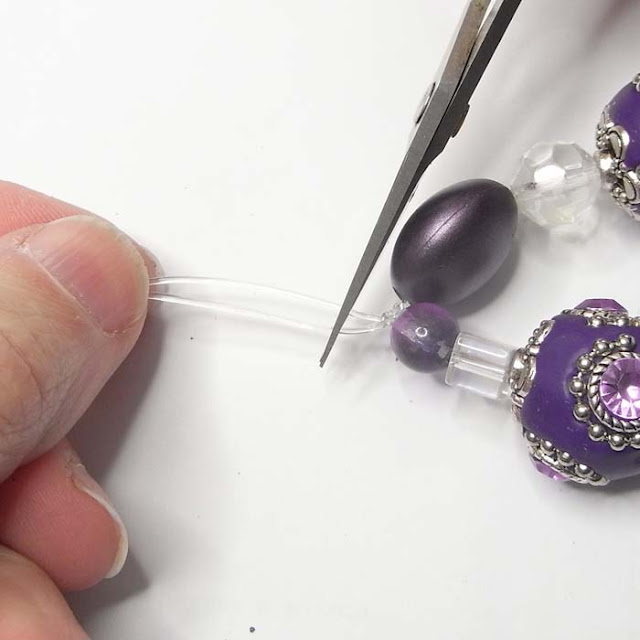
- Slide the finished knot into the nearby large-hole bead to hide it.
Why G-S Hypo Cement? Its precision tip helps you apply glue exactly where it’s needed without making a mess.
🧼 Caring for Your Stretch Bracelet
Want your creation to last longer? Treat it gently. Elastic breaks down with exposure to:
- Water (remove before showering or swimming)
- Heat and cold (avoid extreme temperatures)
- Chemicals (including lotions, perfumes, and soaps)
🔄 How to Wear Without Overstretching
Stretch bracelets aren’t meant to be yanked over your hand like a rubber band. Here’s a smarter way to wear them:
- Slide the bracelet over your fingers.
- Roll it onto your wrist, instead of stretching it.
- Remove the same way—roll it off gently.
Bonus: This method reduces stress on both the elastic and the knot.
🧵 Final Thoughts
Stretch bracelets are the perfect introduction to jewelry making. With just a handful of beads, a bit of elastic, and a well-tied knot, you can create stylish accessories that are easy to wear and totally customizable.
The key takeaway? Pre-stretch your cord and use a strong, hidden knot sealed with glue. This little technique can make the difference between a bracelet that lasts for years versus one that pops apart after a few wears.
Now that you know how to make a stretch bracelet that holds up—why not create a few as gifts? They’re quick to craft and endlessly personal.
📌 Pin it for later: Want to keep this guide handy? Save it on Pinterest or bookmark the page so you can return anytime you’re in a crafty mood.