Recycling old jeans into a roomy weekend bag is a fun, practical project.
This guide walks you through every step with detailed instructions, measurements, tools, and helpful tips so you can complete the bag even if you’re a confident beginner.

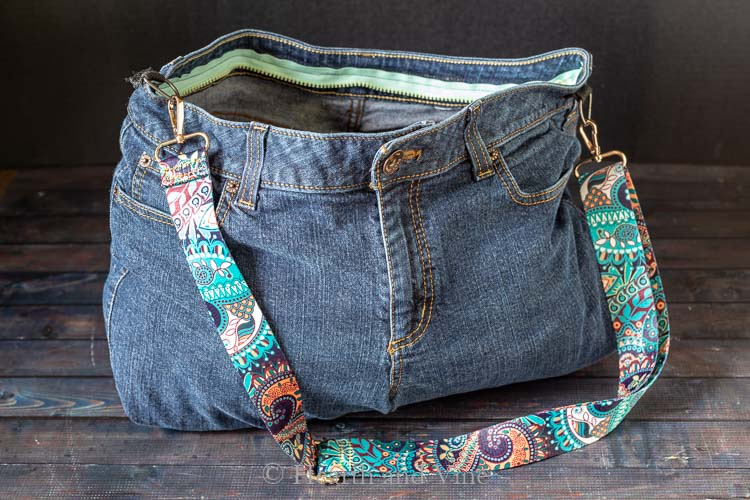
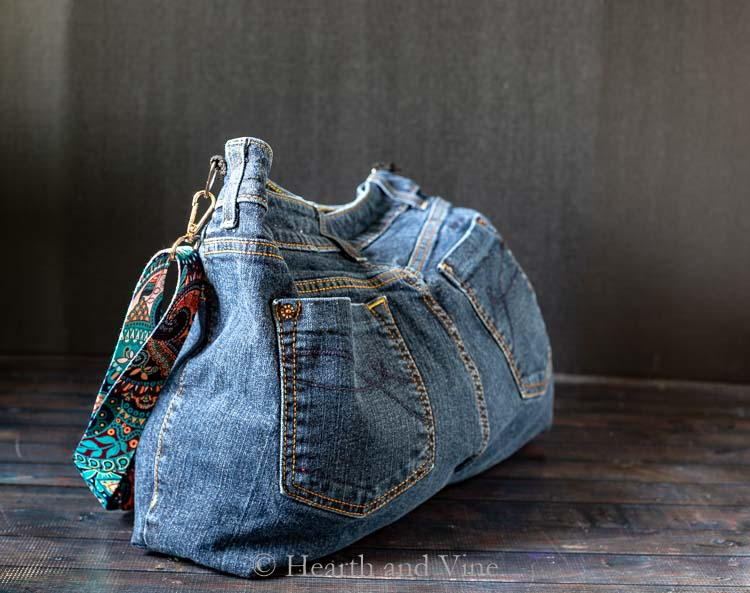
The finished bag is sturdy, roomy, and full of character — and you’ll love the eco-friendly feel.
At a glance
What you’ll make: A boxed-bottom weekend bag built from the body of a pair of jeans, finished with a zipper and D-ring strap attachments.
Skill level: Beginner to intermediate (basic sewing machine skills recommended).
Approx time: 2–4 hours depending on experience and whether you add a lining or custom strap.
Supplies & tools
Materials
- 1 old pair of jeans (wash & press first). Choose a pair with an intact waistband and pockets you want to keep.
- Zipper (length depends on your jeans; example uses a 16-inch zipper) — nylon coil zippers are easiest to trim if needed.
- 2 × 1-inch D-rings
- 1-inch twill tape (small pieces for D-ring tabs)
- Decorative purse strap OR denim to make your own strap
- Polyester fiberfill (only if you plan to stuff small features — optional)
Tools
- Sewing machine (a heavy-duty or standard machine with denim/jeans needle)
- Denim needle 90/14 (or 100/16)
- Heavy-duty polyester thread (topstitching thread optional)
- Zipper foot for your machine
- Scissors and/or rotary cutter + ruler
- Pins and/or Wonder Clips
- Seam ripper
- Measuring tape and fabric marker/chalk
- Iron and ironing board
- Optional: walking foot (helps feed heavy seams), hand needle for small finishing stitches
Prep: choose & prepare the jeans
- Launder and fully dry the jeans. Press them flat. This removes dirt and shrinks any fibers so your finished bag holds its shape.
- Inspect the waistband and pockets. Decide whether you want to keep the front/back pockets as external features — they’re attractive on the finished bag and handy for small items.
How to make the jean bag — Detailed steps
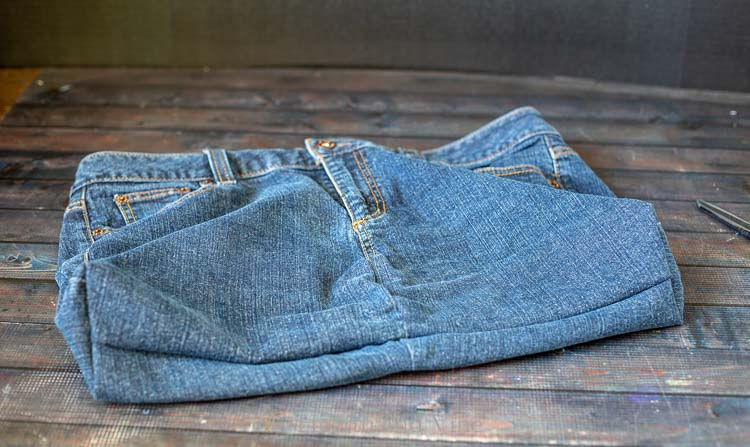
Step 1 — Cut off the legs (create the bag tube)
- Lay the jeans flat on a table with the front facing up.
- Measure and mark a straight line below the crotch seam, so you keep as much usable fabric as possible. The line should be even around the leg openings.
- Cut across both legs on that mark. You’ll now have a short “tube” formed by the top half of the jeans (waistband, pockets, and hip area). Save the legs — they make great straps, pockets, or placemats later.
Tip: If the legs are very wide, you’ll get more bottom depth. If you want a narrower bag, cut a bit higher.
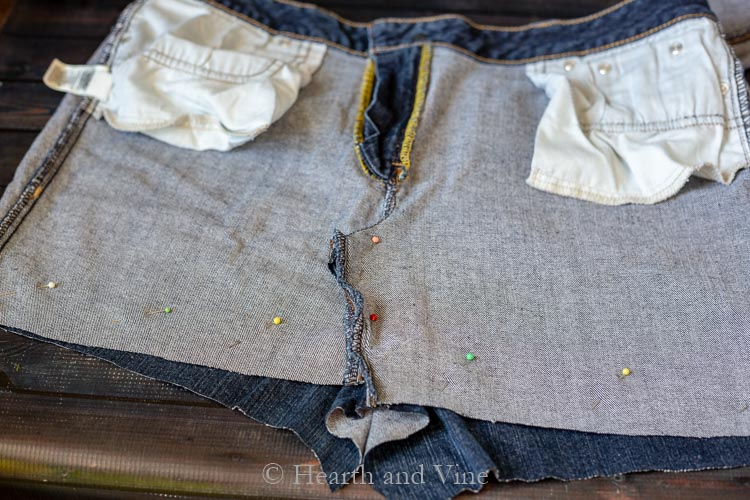
Step 2 — Open and flatten the front and back seams

The goal is to turn the jeans’ curved, 3D shape into a flat rectangle you can sew into a bag.
Front (fly)
- Use a seam ripper to carefully unpick the front fly placket stitching only as needed to allow the front to lie flat. Don’t rip the waistband. Work slowly to avoid damaging pocket edges you want to keep.
- Press the opened seam flat with an iron. Pin the newly flattened area so the fabric lies smooth and even.
- With right sides together where needed, stitch a straight line down the center where the fabric now meets to secure it flat. Use a 1/2″ seam allowance for consistency. Backstitch at the start and end.
Back
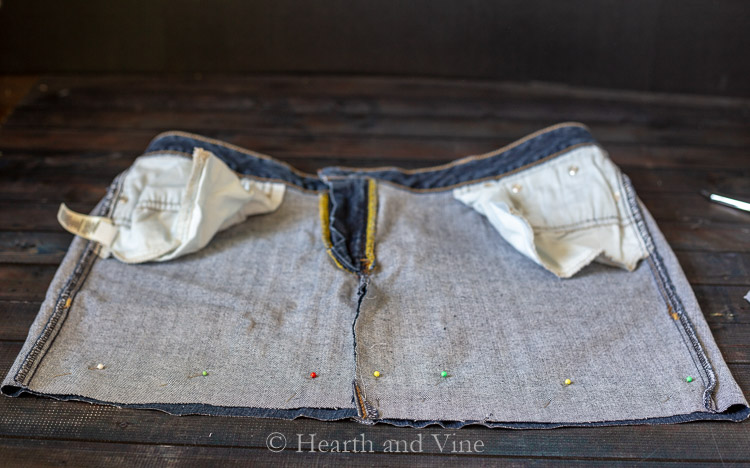
- Repeat the same flattening process on the back center seam. Open any topstitching that prevents the fabric from lying flat, press, pin, and sew a center seam so the back is similarly flat.
Finish: Trim excess seam allowance and press the sewn seams flat.
Tips:
- If the jeans have a yoke or curved stitching, unpick only what’s necessary. Keeping pocket structure intact usually gives a nicer finished look.
- Use heavy-duty thread and a denim needle to avoid skipped stitches.
Step 3 — Pin and sew the bottom seam (close the bottom)
- Turn the flattened tube of fabric so the wrong sides are together and the raw leg edges are aligned for the bag bottom. Align side seams so the bag shape is balanced.
- Pin the raw bottom edges together evenly.
- Stitch across the bottom using a ½-inch seam allowance. Sew slowly and backstitch at each end. If your machine struggles, use a walking foot or stitch over the seam with shorter stitch length (2.0–2.5 mm).
Tip: Press the bottom seam open or toward one side for a neat finish.
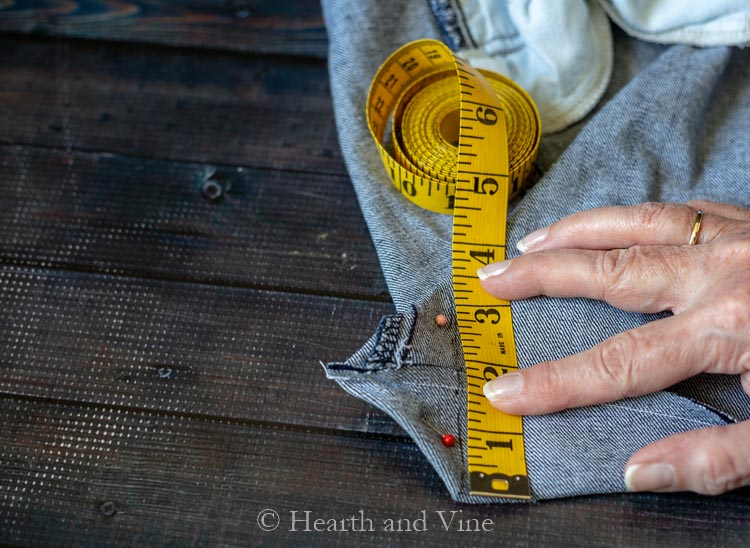
Step 4 — Make a boxed (flat) bottom
Boxing the corners gives the bag a flat base so it stands upright.
- Turn the bag so you can see the bottom corner seams. Match the side seam to the bottom seam so they form a triangular point. You should be able to pinch the corner into a triangle.
- With the triangle point facing you, measure 3.5 inches across the base (this is the width the tutorial used). To mark the sewing line: from the point, measure up along one folded edge 3.5″, then across to the other edge and draw a line perpendicular to the fold. This creates a straight line to sew.
- Pin and sew along that marked line. Backstitch at both ends. Trim the excess triangle tip off, leaving about 1/4″ seam allowance to reduce bulk.
- Repeat on the other side.
Result: When you turn the bag right-side-out, the bag will have a rectangular boxed bottom approximately 3.5″ deep.
Tip: If you want a deeper bag, increase the 3.5″ measurement. For a narrower bottom, use less.
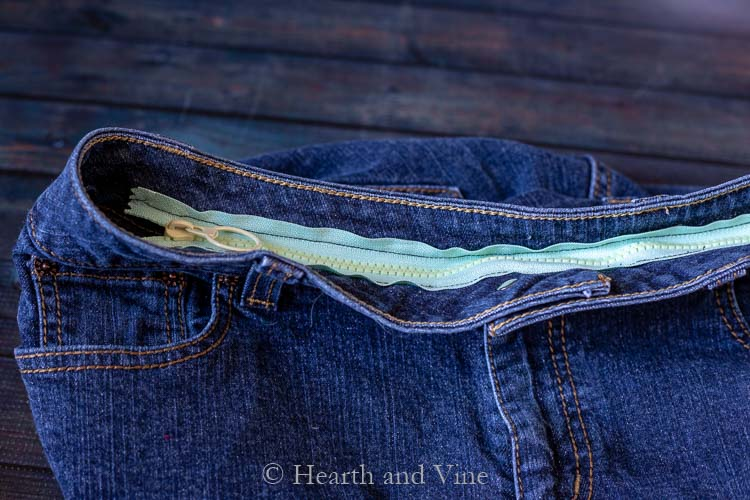
Step 5 — Add the zipper (close the top)
A zipper keeps contents secure and gives a professional finish.
Positioning
- Decide whether you want the zipper to sit just under the waistband (inside the bag rim) or to be visible on the outside. The guide places it inside the waistband for a clean exterior.
Attach zipper — method
- Unzip the zipper and lay the bag flat with the top opening facing you. If your zipper is longer than the opening, either use a longer zipper and fold the excess tape under, or trim a nylon coil zipper carefully and crimp new stops (metal zippers are harder to trim). A 16″ zipper worked for the example pair.
- Place one zipper tape along the inside top edge of the bag (just under the waistband). Align zipper teeth parallel to raw top edge. Pin or baste in place.
- Using your zipper foot, stitch close to the zipper teeth — about 1/8″ from the coil. Sew slowly and backstitch at both ends. Use navy/blue thread to blend if using indigo denim.
- Close zipper and repeat on the other side: open zipper so it lies flat again; pin the second tape to the opposite inside top edge and stitch.
- Test the zipper several times; open and close to ensure smooth action. If one side puckers, unpick and re-baste with calmer tension.
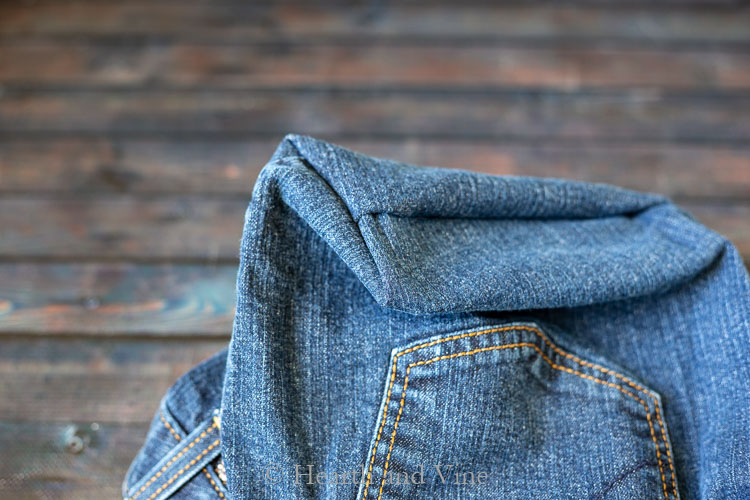
Finish
- Fold the zipper tape to the inside and topstitch around the bag top if desired for a cleaner finish and to secure the zipper seam.
Tips:
- Baste the zipper by hand first if you’re nervous.
- If your machine struggles near the thick waistband seam, hand tack the zipper through that area or sew slightly above the very thick edge.
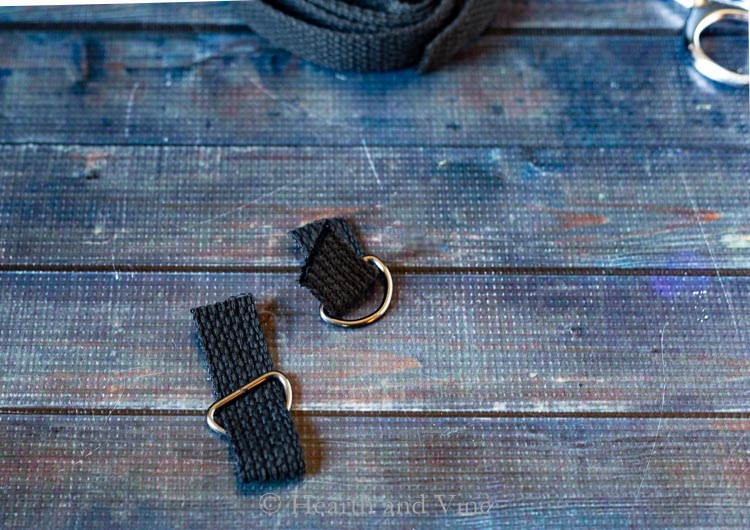
Step 6 — Add D-rings to attach a strap

These small hardware tabs will hold your strap.
- Cut two pieces of 1″ twill tape about 3/4″–1″ long. Slide each through a D-ring so the ring sits at the center.
- Fold the raw end(s) of the twill tape under about 1/4″ to 1/2″ for a clean edge.
- Position the ring tabs at the top side seams of the bag — about 1″ down from the waistband seam and snug against the side seam. Pin or clip in place.
- Sew each tab securely onto the bag with several passes of stitching (a reinforced rectangle or box-X stitch is best). Trim any extra twill tape.
Tip: Place the D-rings symmetrically. Measure from the top seam to ensure both are even.
Step 7 — Clip or attach a decorative strap (and how to make one from the leg)
You can buy a decorative strap, or make one from the saved jean legs. Here are detailed steps to make a strap like the original example.
Example desired finished strap: 30″ length × 2″ finished width.
Cut & join fabric
- Because a single strip from the leg may not be long enough, cut two strips at 17.5″ long × 5″ wide each. This gives you waste for seam allowances and will become a 34″ piece after joining. (These numbers come from the example — alter to desired final length.)
- Place the two strips right sides together, matching short ends. Stitch the short ends together with ½″ seam allowance. Press the seam open. You now have a longer strip.
Form the strap tube
3. Fold the long strip lengthwise, right sides together, aligning raw long edges. Pin.
4. Sew the long edge with a ½″ seam allowance to form a tube. Backstitch at start and finish.
5. Turn the tube right-side-out. Use a safety pin or turning tool to pull it through. Press flat, then topstitch close to both long edges to flatten and finish.
Attach to D-rings / bag
- Option A — loop through D-rings: Fold under the end of the strap by ½″, loop it through the D-ring, then fold back and sew a strong box stitch to secure.
- Option B — sew strap ends directly to the bag top edge: fold raw edges under ½″ and stitch the strap end directly onto the top side of the bag. Reinforce with a box stitch.
Tip: For extra comfort, include a 1″ strip of thin batting or thin webbing inside the strap before folding. This gives padding.
Optional: Add a lining (clearer, stepwise)
A lining hides raw seams and makes the bag more polished.
- Measure the interior of your finished (unlined) bag: circumference (top edge), height, and boxed bottom measurements.
- Cut lining fabric to match those dimensions, allowing ½″ seam allowances. Assemble the lining exactly like the outer bag: sew side seams, stitch the bottom, and box the corners at the same size (3.5″).
- With the outer bag wrong side out and the lining right side out, insert the lining into the outer bag so right sides face each other at the top edge. Align seams and pin.
- Stitch around the top edge with a ½″ seam allowance, then turn the bag right side out by pulling the outer bag through the opening. Press the top edge and topstitch around to finish.
Finishing touches & reinforcement
- Trim loose threads.
- Topstitch around the top edge 1/8″–1/4″ from the edge for durability and a finished look.
- Reinforce stress points (strap attachments and zipper ends) with extra stitching or small rivets.
- If pockets flap or are loose, topstitch around pocket edges to secure them. They make great external pockets.
Troubleshooting & common questions
- Machine struggles over thick seams: Use a walking foot and a denim needle. Hand-stitch over the last bit if needed.
- Zipper puckers: Re-baste the zipper flat and ensure even pinning. Lower presser foot pressure if your machine allows.
- Bag won’t stand up: Increase boxed bottom depth to 4–5″ or insert a thin cardboard or plastic base inside a lining pocket.
- Seam bulk at boxed corners: Trim to 1/4″, grade seam allowances, and press well before turning right-side-out.
Variations & creative ideas
- Keep the original front pockets for external storage and personality.
- Use jean leg panels to add exterior patch pockets or decorative stripes.
- Add a zipper pocket inside by sewing a small denim rectangle into the lining.
- Embellish with studs, embroidery, or patches for a personalized look.
Care & washing
- Spot clean as needed. For heavy dirt, turn the bag inside out and wash on a gentle cycle in cool water. Air dry to avoid shrinking.
- Repress seams before use if the bag gets wrinkled.
Final thoughts
This DIY jean bag is a practical, satisfying upcycle. The process uses basic sewing techniques (straight seams, boxed corners, attaching a zipper) but yields a strong, stylish bag that’s uniquely yours.
Save the legs for straps, patch pockets, or placemats — nothing goes to waste.