
Nice — you asked for the same treatment as before: expanded, step-by-step, and crystal-clear instructions.
Below I rewrote and expanded the first 25 mug designs you provided, keeping the original order and turning each idea into a practical mini-project with materials, step instructions, and helpful tips.
At the top I’ve included a thorough prep/safety section you can follow across every design — read that once, then jump to any concept and follow the steps.
Before you start — materials, prep, and safety (read this first)
Common materials (use as appropriate per design):
- Plain ceramic or porcelain mug (unglazed is easiest to glaze, but glazed mugs work too)
- Ceramic/porcelain paints or enamel paints (or porcelain paint pens/markers) labeled food-safe if you’ll paint the rim/inside
- Acrylic paint (only for exterior designs; not food-safe unless sealed with a food-grade sealer)
- Paintbrushes: small round (size 0–2), medium flat (1/4″–1/2″), fine liner brush
- Sponge or makeup sponge for sponging/blending
- Dotting tools, toothpicks, or the blunt end of a paintbrush for dots/splatter control
- Painter’s tape or low-tack masking tape for crisp edges
- Pencil (light) for tracing/sketching
- Isopropyl alcohol, lint-free cloths, mild soap
- Fine-grit sandpaper (optional; for roughing glossy surfaces)
- Clear sealer: dishwasher-safe clear ceramic sealer or food-safe epoxy (follow manufacturer)
- Oven (for oven-cure paints) or access to kiln (for ceramic glazes)
- Disposable palette, cup of water, paper towels
Prep steps (do this for every mug before painting):
- Wash the mug thoroughly with warm soapy water, rinse, and dry. Remove any stickers or residue.
- Wipe the painted area with isopropyl alcohol on a lint-free cloth to remove oils and dust.
- If the surface is very glossy, lightly scuff with fine sandpaper and then wipe again — this helps paint adhere.
- Mask any areas you will not paint (handle, rim, interior) using painter’s tape if desired.
- Sketch your design lightly with pencil if you want a guide.
Curing & sealing — brief guidance (must follow paint brand instructions):
- Porcelain/ceramic paints / paint pens: many brands are cured in a home oven (common guideline: bake at ~300–350°F / 150–180°C for 30–90 minutes) — but always use the exact temperature and time on the paint label. Let the mug cool in the oven to avoid cracks.
- Kiln glazes: if you use traditional ceramic glaze, you must kiln-fire; follow the glaze’s firing schedule.
- Acrylic paint: usually not dishwasher safe; you can seal with a dishwasher-safe clear sealer or food-grade epoxy if required — check product compatibility.
- Always avoid painting the interior or lip of the mug unless your paint/sealant is explicitly labeled food-safe.
Cleaning & care: Unless paints/sealers state dishwasher safe, hand wash gently. Avoid scrubbing painted areas.
Now — the ideas, in order, with step-by-step instructions.
1. Ocean Waves — cresting design
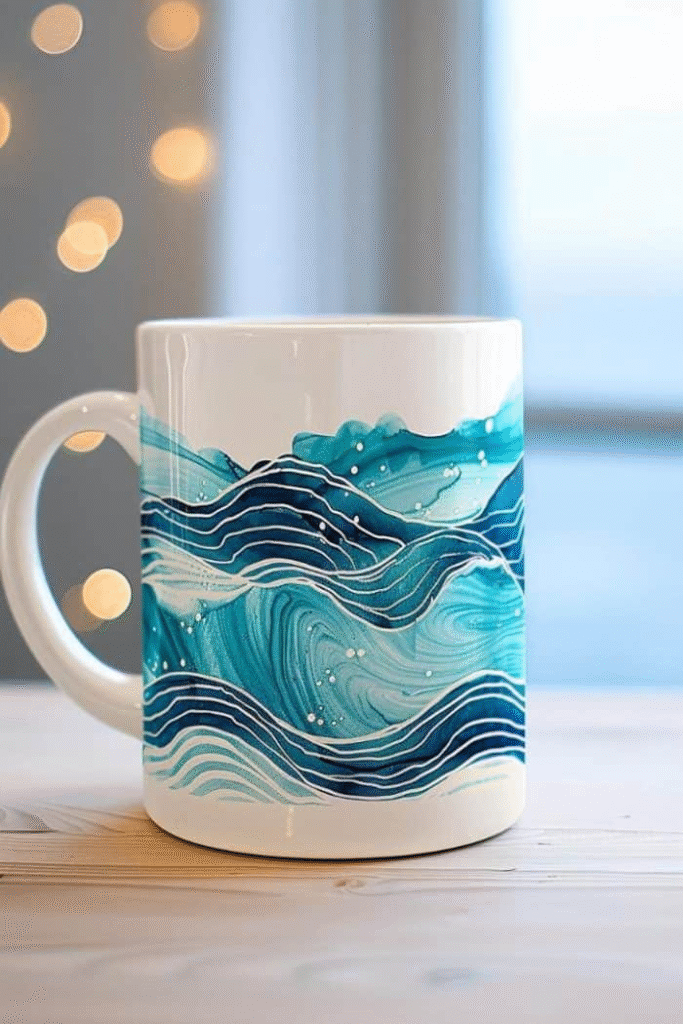
Look & feel: layered blues with white foamy crests — a sense of movement.
Materials: ceramic blue paints (2–3 blue shades), white paint, medium flat brush, small round brush, sponge.
Steps:
- Base coat the lower two-thirds of the mug in the darkest blue; let dry.
- Using a medium flat brush, add a mid-tone blue band above the base, then a lighter blue toward the top to create a horizontal gradient. Lightly blend the seams with a slightly damp sponge while paint is wet for a soft transition.
- With a small round brush and white paint, paint sweeping arcs where waves crest. Use quick upward flicks for foam.
- Tap a dry toothbrush or lightly flick white paint for speckles and sea spray.
- Let dry, apply a second thin layer of white highlights, then cure per paint instructions.
Tips/variations: Add a glossy glaze over the crests for a wet look. Use metallic blue or iridescent white for shimmer.
2. Starry Night Sky motif

Look & feel: deep navy background speckled with stars; big and tiny stars create depth.
Materials: navy paint, white paint, toothbrush or small splatter brush, fine liner brush or paint pen.
Steps:
- Paint the entire exterior navy (or mask rim/handle first). Let dry and apply a second coat for even coverage.
- Dip a toothbrush in thinned white paint and, holding it away from the mug, run your thumb across the bristles to splatter tiny stars—practice on scrap first.
- Use a fine liner brush to paint larger star shapes and small clusters — vary size and brightness.
- Add a few tiny metallic dots (gold or silver) for “distant” stars.
- Cure/seal per paint instructions.
Tips: For nebula effects, sponge in faint purples/teals before splattering. To make constellations, lightly pencil guides before adding larger stars.
3. Abstract color splashes
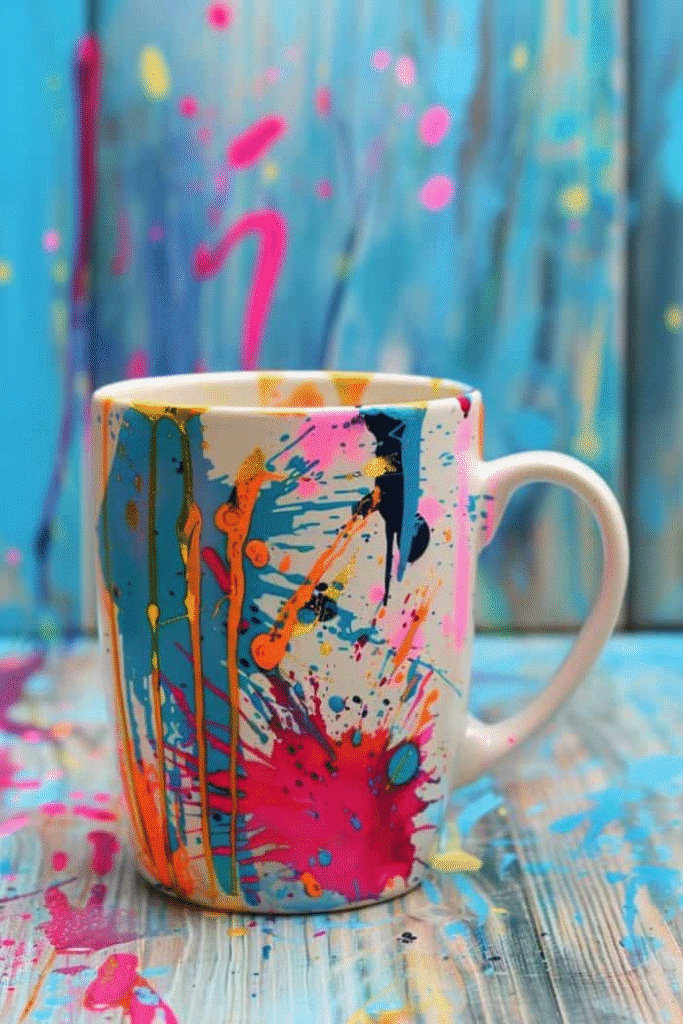
Look & feel: spontaneous drips, splatters, and layered color marks.
Materials: several colors of paint, droppers or brush, toothpick, palette.
Steps:
- Decide on a color palette (3–5 colors). Keep base coat neutral or leave the mug white.
- Load a brush heavily and, while holding the mug over newspaper, flick/press to produce splatters and drips. Alternatively, drop paint with a pipette for controlled blobs.
- Let each layer dry a bit, then add new colors to create overlapping areas. Use a toothpick to pull small lines or blend edges when still wet.
- If you want an enamel finish, add a clear gloss coat once dry and cured.
Tips: Work outdoors or cover surfaces—splattering is messy. Use a hairdryer on low to set drips quickly if needed.
4. Mountain landscape silhouette

Look & feel: clean silhouette mountains against a soft gradient sky.
Materials: gradient colors for sky, black/charcoal paint for mountains, flat brushes, pencil.
Steps:
- Paint a horizontal gradient for the sky: start with the lightest color at the top, blend into deeper tones toward the horizon using a sponge.
- Once dry, pencil simple mountain outlines.
- Fill in silhouettes with deep gray or black using a small flat brush — keep jagged peaks for realism.
- Add small details like a moon, tiny stars, or a layered mid-ground if desired.
- Cure/seal.
Tips: Use masking tape to create a crisp horizon if you want a sharp edge. For layered depth, paint closer peaks darker, farther peaks lighter.
5. Blooming cherry blossoms
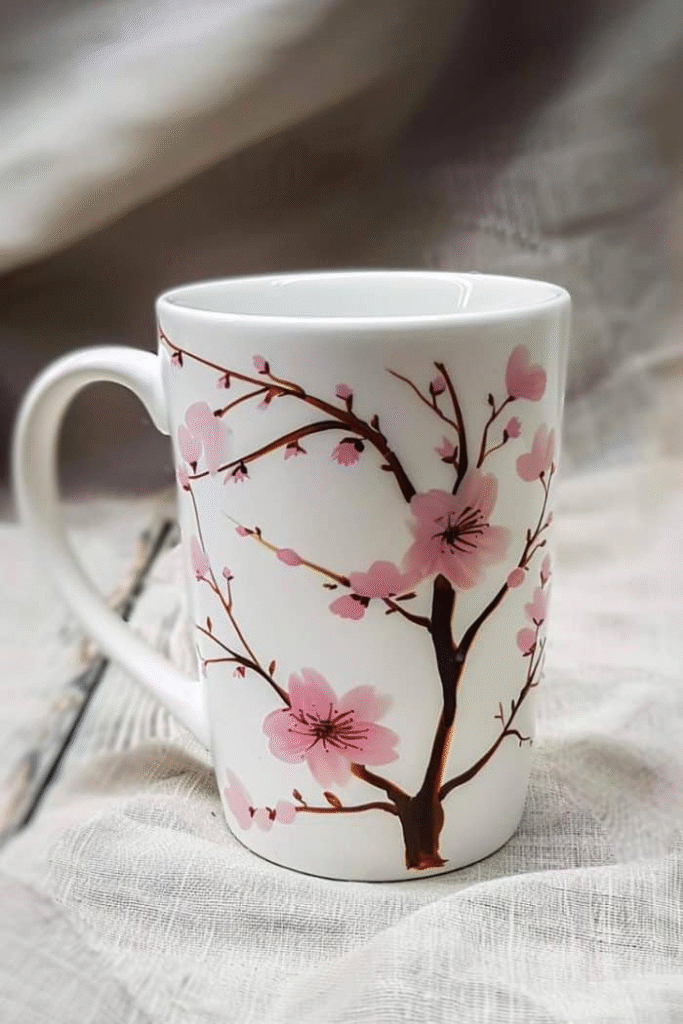
Look & feel: delicate branches and soft pink blooms winding around the cup.
Materials: brown for branches, several pink shades, small round brush, dotting tool or end of brush.
Steps:
- Paint thin, flowing branches across the mug with brown paint; vary thickness by pressure.
- Use a light pink base to add blossom clusters: paint small five-petaled shapes or blobs where the branches meet.
- Add darker pink centers and tiny white highlights with a dotting tool for dimension.
- Optionally add scattered petals falling down the side.
- Cure/seal.
Tips: Use a reference photo to place blossoms naturally. For watercolor-like petals, thin paints slightly and layer translucent washes.
6. Whimsical polka dots
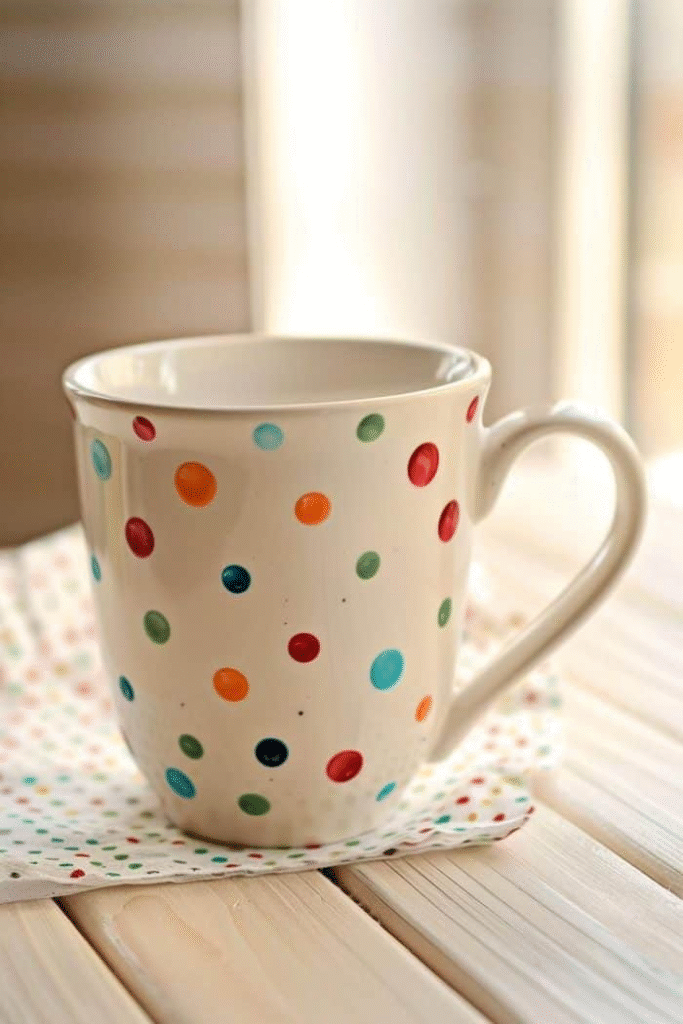
Look & feel: playful dots of varying sizes and colors around the mug.
Materials: assorted colors, dotting tool or the back end of brushes, pencil for layout.
Steps:
- Lightly pencil a random dot layout or use a template.
- Dip a dotting tool into paint and press to create consistent dots. Vary sizes by using different tools or brush ends.
- Let dots dry completely before adding overlapping dots of different colors.
- Cure/seal.
Tips: Use a ruler if you want evenly spaced rows; otherwise embrace an organic, scattered look.
7. Geometric lines
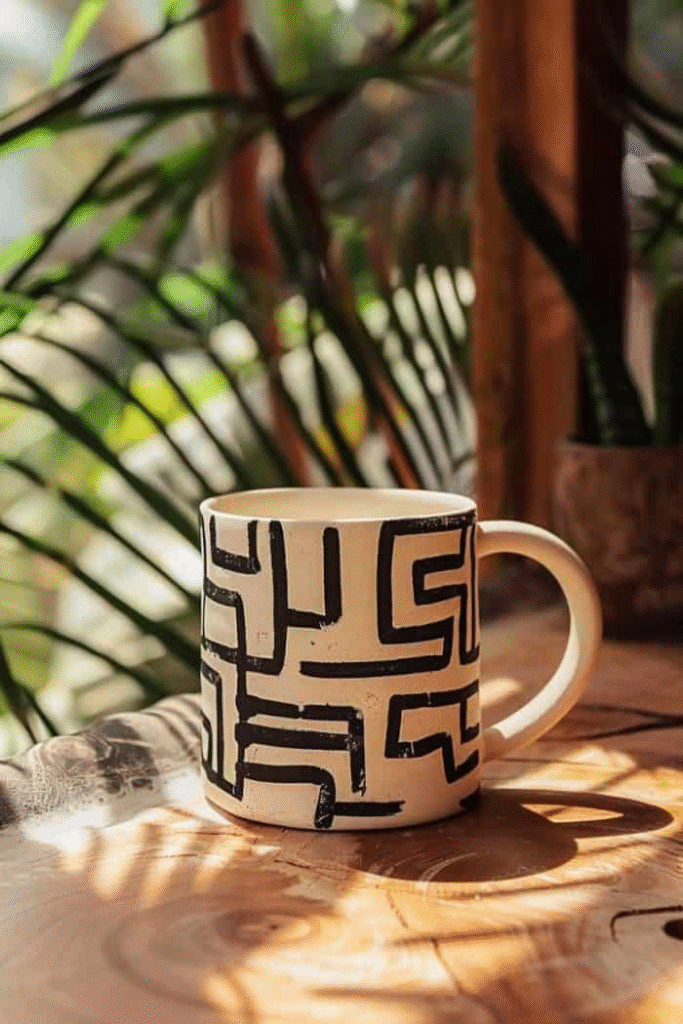
Look & feel: modern, clean lines — minimalist or complex grids.
Materials: fine liner brush or paint pens, painter’s tape for crisp lines, ruler.
Steps:
- Plan your geometry on paper; transfer lightly with pencil.
- For perfectly straight lines, apply painter’s tape and paint over it. Remove tape after paint becomes tacky but not fully dry to avoid peeling.
- For freehand patterns, use a fine liner brush and steady wrist to draw lines; work slowly for straight results.
- Add intersecting colors or thin metallic accents for an elevated look.
- Cure/seal.
Tips: Use metallic paint for accents. For precision, apply two thin coats rather than a single thick one.
8. Vibrant tropical foliage
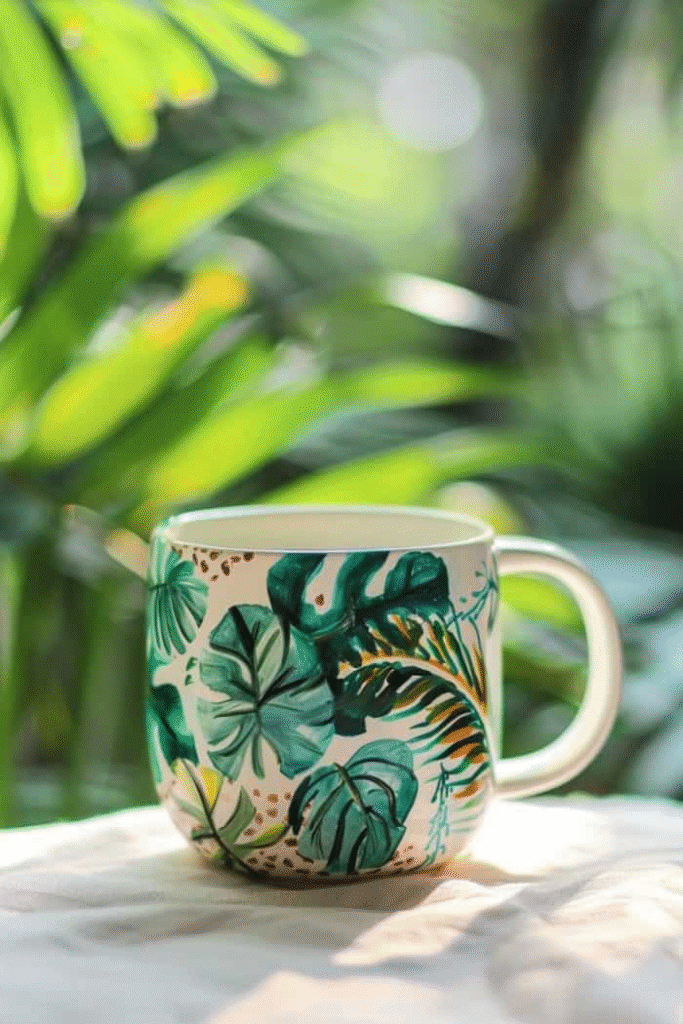
Look & feel: layered greens and colorful accents — jungle vibes.
Materials: various greens, lime/yellow, small round brush, palette knife or tiny sponge for texture.
Steps:
- Layer base greens for background leaves using large brush strokes.
- Paint foreground leaves with darker tones and add mid-vein details in lighter or darker shades for dimension.
- Add small colorful accents (pink or yellow) as flowers or bird-of-paradise details.
- Apply highlights with a fine brush to give leaves a glossy, three-dimensional look.
- Cure/seal.
Tips: Overlap leaves to create depth; use dry-brushing for fine texture.
9. Classic check (gingham/checker) pattern

Look & feel: cozy, country checks in two or three colors.
Materials: base color paint, tape or ruler, small flat brush, white or accent color.
Steps:
- Paint the entire mug in the lightest color (if using a colored base). Let dry.
- Use painter’s tape to mask parallel vertical stripes evenly spaced.
- Paint between the tape lines with a secondary color. Remove tape once paint is tacky.
- Repeat masking horizontally to create the check pattern and fill with third color if desired.
- Add fine white outlining with a liner brush for definition, then cure/seal.
Tips: Test tape on scrap to ensure it won’t lift the basecoat when removed.
10. Nautical anchor and stripes
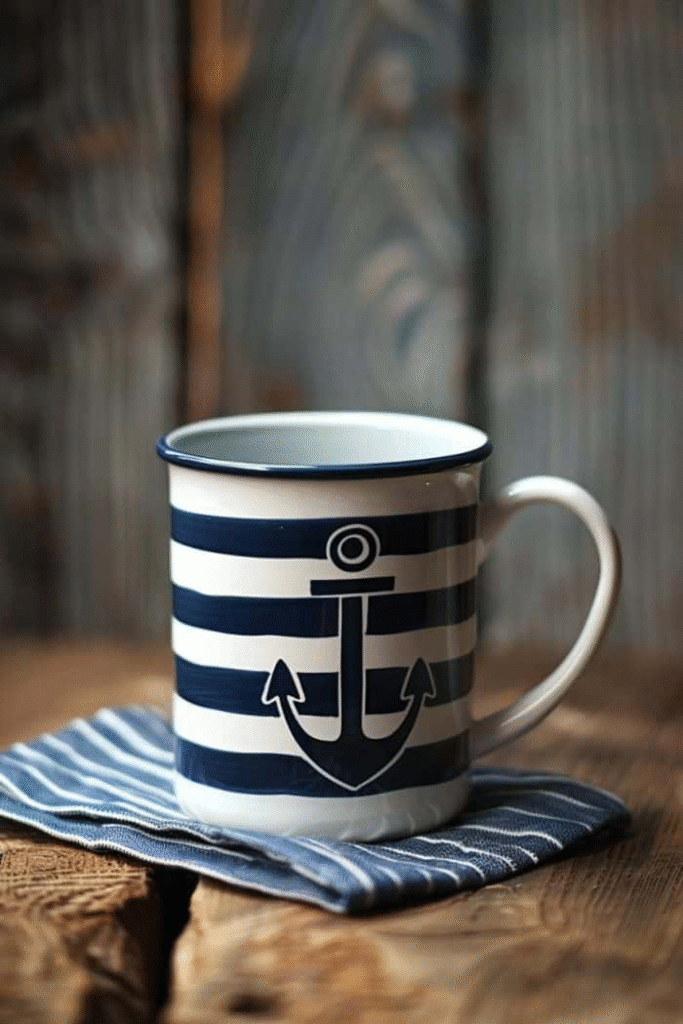
Look & feel: classic navy and white stripes with a bold anchor motif.
Materials: navy and white paints, anchor stencil or pencil sketch, fine brush, tape.
Steps:
- Mask the mug with tape to paint even horizontal stripes in alternating navy and white.
- Once stripes dry, center an anchor stencil on the face of the mug or freehand draw the anchor.
- Fill the anchor in navy or a contrasting metallic; outline with a thin white or gold line for emphasis.
- Cure/seal.
Tips: Use gold paint for rope details around the anchor to make it pop.
11. Sunrise gradient effect
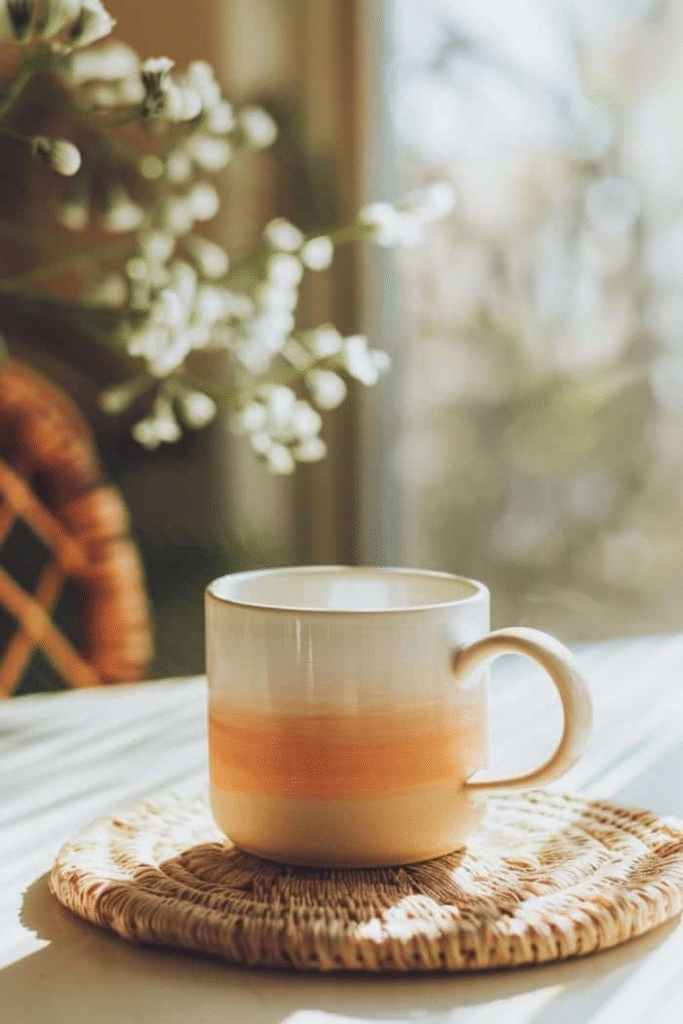
Look & feel: warm gradient from amber to pale yellow — soft, uplifting.
Materials: amber/orange/yellow paints, sponge, soft flat brush.
Steps:
- Starting at the bottom, apply the darkest amber.
- Use a damp sponge to blend upward into orange, then into pale yellow at the top. Work in small areas while still damp to keep transitions smooth.
- Go back and soften any hard edges with a clean sponge.
- Add thin silhouette details (birds, tree line) in dark paint if desired.
- Cure/seal.
Tips: Work quickly for smooth wet-on-wet blending. For extra glow, add a very thin wash of iridescent paint over the horizon.
12. Playful doodle characters
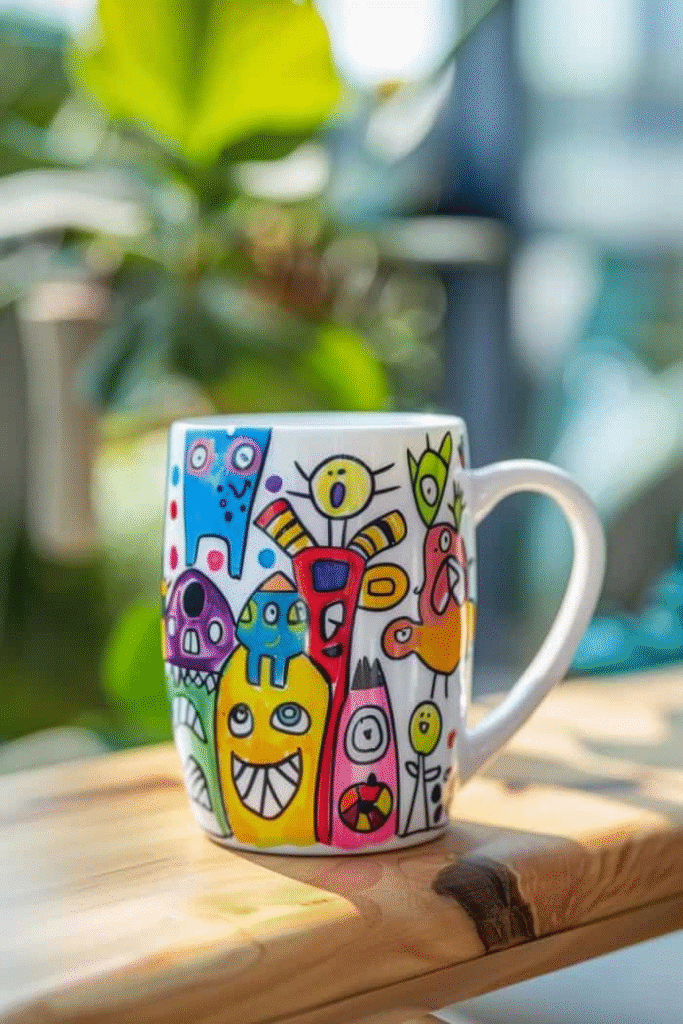
Look & feel: hand-drawn cartoons and little figures wrapping the mug.
Materials: paint pens (fine tips), small round brush, pencil.
Steps:
- Lightly sketch characters around the mug — spacing is key so the handles don’t interrupt faces.
- Trace and fill sketches with paint pens or a fine brush. Use bold outlines for comic style.
- Add color blocks and small details (blush, freckles, props).
- Cure/seal.
Tips: Use waterproof pens if you plan to add water-based washes beneath outlines. Draw faces slightly larger than you think — tiny details can get lost.
13. Elegant Mediterranean detailing
Look & feel: tile-inspired motifs, gold details and refined lines.
Materials: cobalt/terra-cotta paints, gold paint/leaf, fine liner brush.
Steps:
- Paint a neutral base or allow the mug’s original color to show.
- Sketch tile motifs (repeating shapes) in pencil.
- Fill motifs with colored paints; let dry.
- Use a fine brush or gold paint pen to outline patterns and add filigree accents.
- Cure/seal.
Tips: Repeating motifs should be consistent — use a small stencil or stamp for repetition. Gold leaf can be applied with adhesive for a luxe finish — seal afterward.
14. Wildflowers
Look & feel: soft vintage blooms with layered petals and soft greens.
Materials: pastel paints, small round brush, fine liner brush.
Steps:
- Paint loose wreath or scattered clusters of leaves first with a light green wash.
- Add bloom centers with small dots; build petals around centers using short brush strokes.
- Layer lighter and darker shades for depth; add tiny seed-like dots for texture.
- Cure/seal.
Tips: For a vintage look, thin your paints and layer translucent washes rather than opaque strokes.
15. Retro paisley swirls
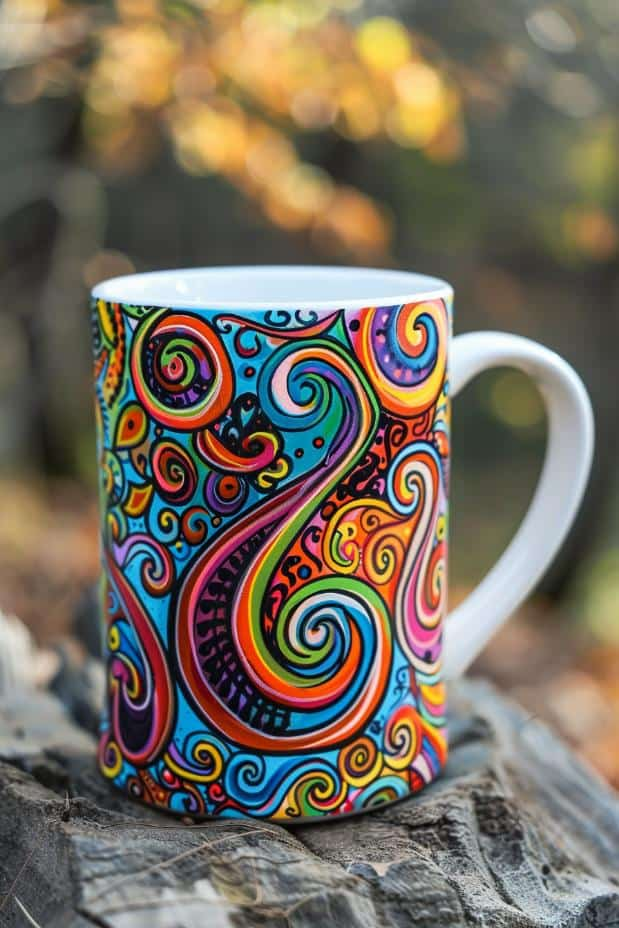
Look & feel: swirling teardrop paisleys in bold throwback colors.
Materials: contrasting paint palette (mustard, teal, rust), liner brush, small round brush.
Steps:
- Pencil large paisley shapes spaced evenly.
- Fill large shapes with base color; add inner layers with dots, stripes, or floral infill using fine brushes.
- Outline shapes with a fine liner for definition.
- Cure/seal.
Tips: Paisley is all about internal patterning — small dots and lines make it feel period-accurate.
16. Cozy knitted sweater texture
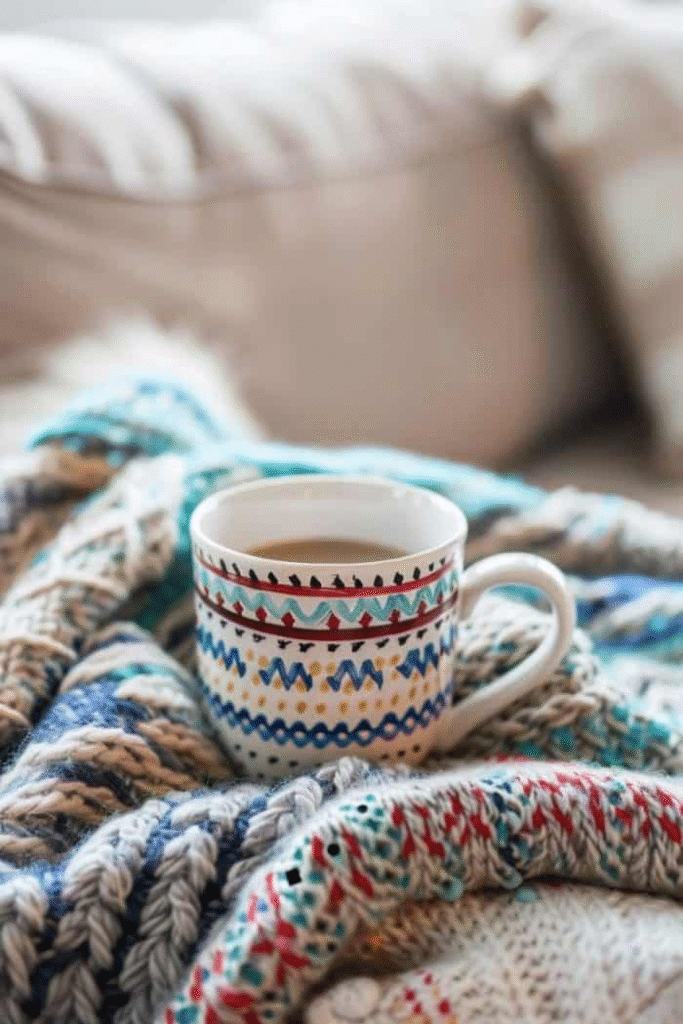
Look & feel: painted stitches that mimic knit — tactile look without real yarn.
Materials: flat and round brushes, two contrasting paint colors for stitch definition, thin liner for stitch lines.
Steps:
- Paint a background color that will read as the “yarn.”
- Use a small flat brush to paint rows of V-shaped stitches across the mug; keep the angle and spacing consistent.
- Add shadow lines under each row with a darker tone, and highlight lines above with a lighter tone to create raised stitch illusion.
- Cure/seal.
Tips: Work in horizontal rows; practice stitch pattern on paper first. For extra texture, use a matte sealer to mimic wool’s look.
17. Art Deco inspired lines
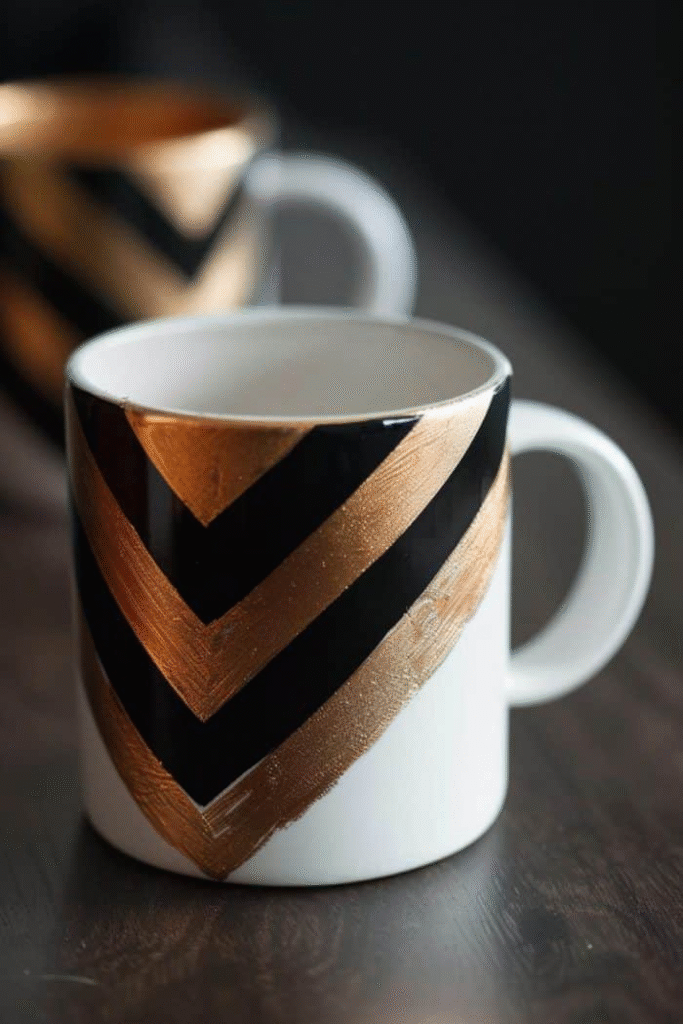
Look & feel: bold triangles, sunburst lines, and metallic accents — glamorous 1920s style.
Materials: black and gold paints, fine liner brush, painter’s tape for geometry.
Steps:
- Plan a central motif (sunburst, fan, stepped triangles).
- Mask areas for perfect geometric edges and paint base colors.
- Add gold linear accents with a thin brush.
- Remove tape carefully and cure/seal.
Tips: Keep lines crisp and symmetrical. Gold on black is classic Art Deco — try a matte black base for contrast with high-shine gold.
18. Cascading waterfall scene
Look & feel: layered blues/whites to simulate falling water and spray.
Materials: blues, white, small sponge or fan brush, gloss sealer.
Steps:
- Paint background rock colors where the waterfall will sit.
- Use layered strokes of blues and whites in vertical motion to create the fall; a fan brush can produce streaky water effects.
- Use white spatter with a toothbrush for mist and foam at the base.
- Finish with a glossy clear coat to mimic water sheen, then cure/seal.
Tips: Gloss sealer enhances the watery illusion. Keep vertical strokes fluid and avoid over-blending.
19. Intricate mandala artwork
Look & feel: symmetrical, highly detailed radial patterns — meditative and ornate.
Materials: bright contrasting paints, fine liner brushes or paint pens, pencil and ruler/compass.
Steps:
- Lightly mark the mug with faint pencil radial guidelines (use a piece of paper wrapped to measure circumference).
- Start at the center point of your design and build outwards with repeated motifs: dots, petals, circles.
- Work slowly with steady hands; use paint pens for highly precise dots and lines.
- Add metallic accents for sparkle and cure/seal.
Tips: Practice sections on paper before committing. A steady wrist and fine tip tools make mandalas sing.
20. Festive holiday ornaments (painted ornaments motif)
Look & feel: tiny ornament shapes with traditional Christmas colors and metallic trim.
Materials: red/green/gold paints, fine liner, dotting tool.
Steps:
- Sketch ornament shapes in a band around the mug or scatter them.
- Paint base ornament colors, then add small decorative details: stripes, snowflakes, stars.
- Outline or add caps in gold.
- Optionally add glittery sealer (food-safe if near rim), then cure/seal.
Tips: Use pencil templates to keep ornaments roughly the same size. For bauble shine, leave a small crescent of unpainted mug surface or add a white highlight.
21. Safari animal silhouettes
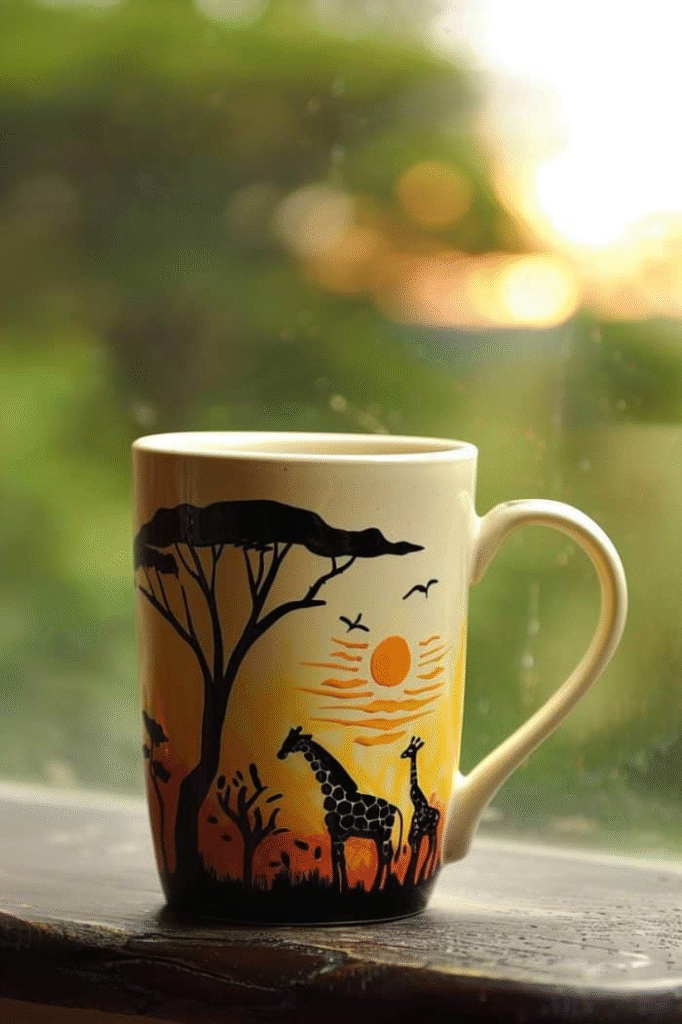
Look & feel: dark silhouettes (giraffe, birds, trees) on a warm sunset background.
Materials: warm gradient paints for background, black paint for silhouettes, small round brush.
Steps:
- Paint a sunset gradient (yellow → orange → deep red) over the main field.
- Once dry, sketch silhouettes in pencil.
- Fill silhouettes in black with a small brush — keep profiles recognizable (long necks, small bird shapes).
- Cure/seal.
Tips: Keep silhouettes simple and graphic; details are read best at a distance when they’re silhouettes.
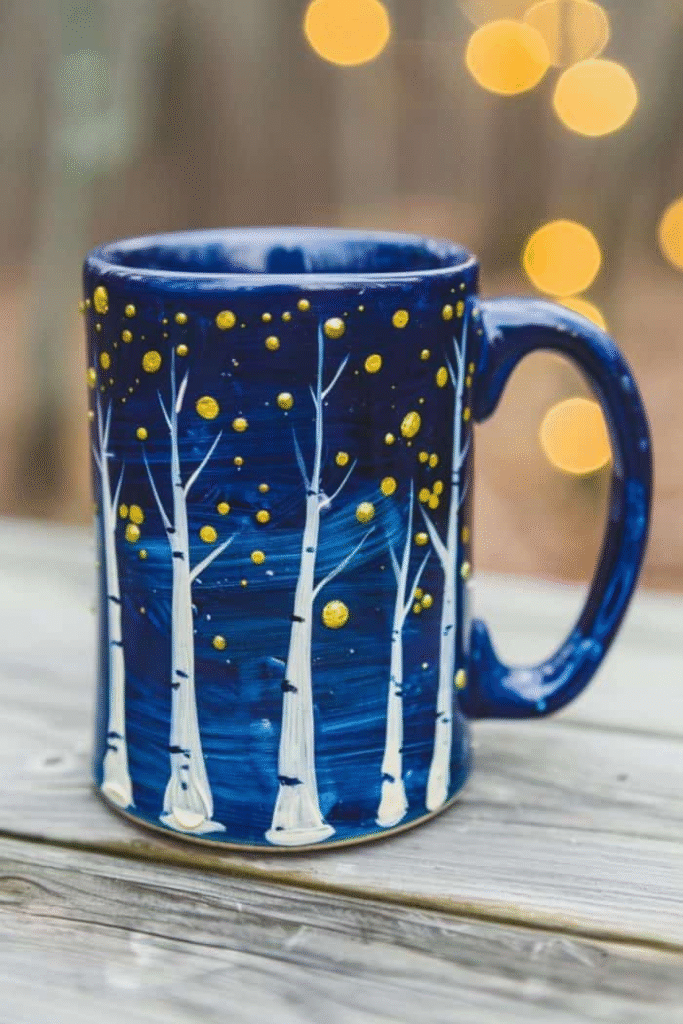
22. Enchanted night in a forest

Look & feel: white bare trees and gold stars on a deep, mystical night sky.
Materials: deep blue/indigo paints, white, gold paint or gold leaf, fine liner brush.
Steps:
- Paint a deep blue background, blending in a lighter blue to create depth.
- Sketch vertical tree trunks and fine branches in pencil.
- Paint the trees in white with a thin liner brush; vary trunk thickness for realism.
- Dot gold stars and small metallic accents in the sky.
- Cure/seal.
Tips: Negative space is powerful here—leave some dark areas untouched for contrast. Use metallics sparingly for elegance.
23. Bold chevron zigzags
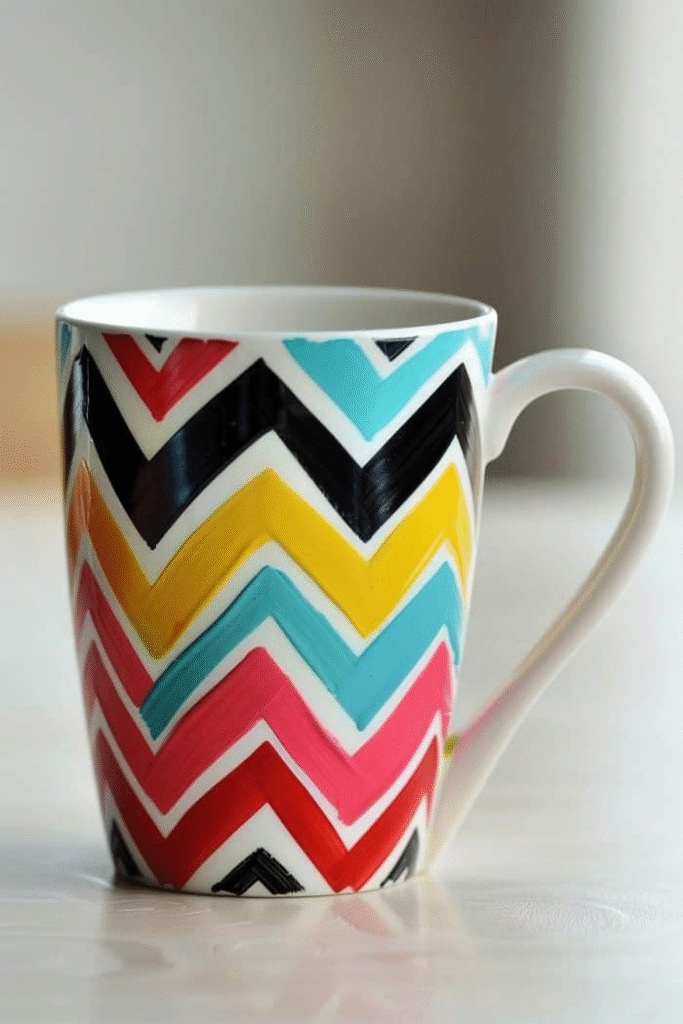
Look & feel: crisp zigzags in high-contrast colors for modern energy.
Materials: painter’s tape, bright contrasting paints, flat brush.
Steps:
- Mark the chevron layout with pencil around the mug circumference.
- Use strips of tape to form the zigzag edges, ensuring tips align around the mug.
- Paint each chevron band with the chosen color; remove tape when paint is tacky for clean edges.
- Touch up small bleeding spots with a fine brush, then cure/seal.
Tips: For multiple colors, allow each band to dry before taping adjacent areas to avoid lifting.
24. Delicate feather imprints
Look & feel: light, airy feather motifs with translucent glaze effects.
Materials: soft washes of paint, liner brush, sponge for soft edges.
Steps:
- Thin paint to create translucent washes; feather form should be slightly curved with barbs.
- Paint a central shaft with thin strokes, then add fine barbs with light, feathery strokes.
- Add subtle shading and highlights to suggest texture.
- Cure/seal.
Tips: Use very small amounts of paint and featherlike strokes — the charm is in subtlety.
25. Cosmic galaxy and planets
Look & feel: swirling nebulas, stars, and small planetary details for an out-of-this-world mug.
Materials: dark base (black/navy), sponges, white paint for splatter, small round brush for planets.
Steps:
- Paint the mug black or deep navy as a base.
- Sponge on nebula colors (purples, blues, teals) in soft circular motions. Blend edges with a clean sponge.
- Splatter small white stars with a toothbrush; add larger star dots with a fine brush.
- Paint planets as small circles with rings or textured surfaces; add tiny highlight dots for dimension.
- Cure/seal.
Tips: Try creating a “planet band” where planets wrap around the mug. Use metallics for ringed planets.