Air dry clay is one of the easiest ways to step into the world of DIY pottery and sculpting. It’s soft, inexpensive, and doesn’t require a kiln or oven, making it perfect for anyone who wants to get creative without special equipment. From handmade gifts to home décor, the possibilities are endless — but like any craft, there are a few tricks that make the process smoother.
In this guide, we’ll walk through 15 beginner-friendly tips to help you shape, dry, and finish your air dry clay projects like a pro while avoiding the most common mistakes.
1. Condition the Clay
Before you dive into sculpting, take a few minutes to condition your clay. Gently kneading it distributes the moisture evenly and makes it more pliable, which reduces cracks and makes shaping much easier. If the clay feels dry or crumbly, mist it lightly with water and work it in until the texture feels smooth and flexible.

Conditioning is especially important for larger projects. Divide the clay into manageable portions and soften them individually — this prevents uneven textures and ensures the entire piece dries consistently. Think of conditioning as “warming up” your clay so it behaves exactly how you need it to.
2. Plan Your Project
Even a rough sketch can save you time and frustration. By planning your design, you’ll have a clear idea of size, proportions, and any details you want to include. A simple drawing or reference photo acts as a roadmap, reducing the risk of missteps once you start working with the clay.
Planning also gives you the chance to identify potential challenges, such as areas that might need reinforcement or extra drying time. With a guide in place, you’ll feel more confident and stay focused, making the process more enjoyable and the final result more polished.
3. Start With Basic Shapes
Complex designs are easier to build when you begin with simple forms. Balls, cylinders, and blocks provide a sturdy foundation that you can refine later. By getting the proportions right at this stage, you won’t waste time perfecting details on a piece that turns out the wrong size.
Once the basic shapes are in place, you can gradually sculpt, carve, and add textures. This step-by-step approach makes projects more manageable, especially for beginners, and helps prevent mistakes that are hard to fix later.
4. Manage Clay Thickness to Avoid Cracks
One of the biggest frustrations with air dry clay is cracking, which often happens when parts of the piece are too thick. Because clay shrinks as it dries, uneven thickness causes stress and weak points. A good rule of thumb is to keep surfaces no thicker than about ¼ to ½ inch.
For larger builds, layer the clay gradually instead of molding a thick block all at once. Allowing each layer to partially dry before adding the next reduces the risk of splits. Also, let your projects dry slowly in a cool, shaded space to give the clay time to set evenly.
5. Use Armature Wire for Support
If your sculpture has limbs, branches, or other delicate extensions, armature wire can make all the difference. Think of it as the skeleton that gives your clay strength and balance, preventing sagging while it dries.
Aluminum wire works especially well because it’s strong yet bendable. You can even wrap it in thinner wire to give the clay something to grip. By shaping the wire into your design before applying clay, you’ll save yourself from structural issues and open up the possibility of more ambitious builds.
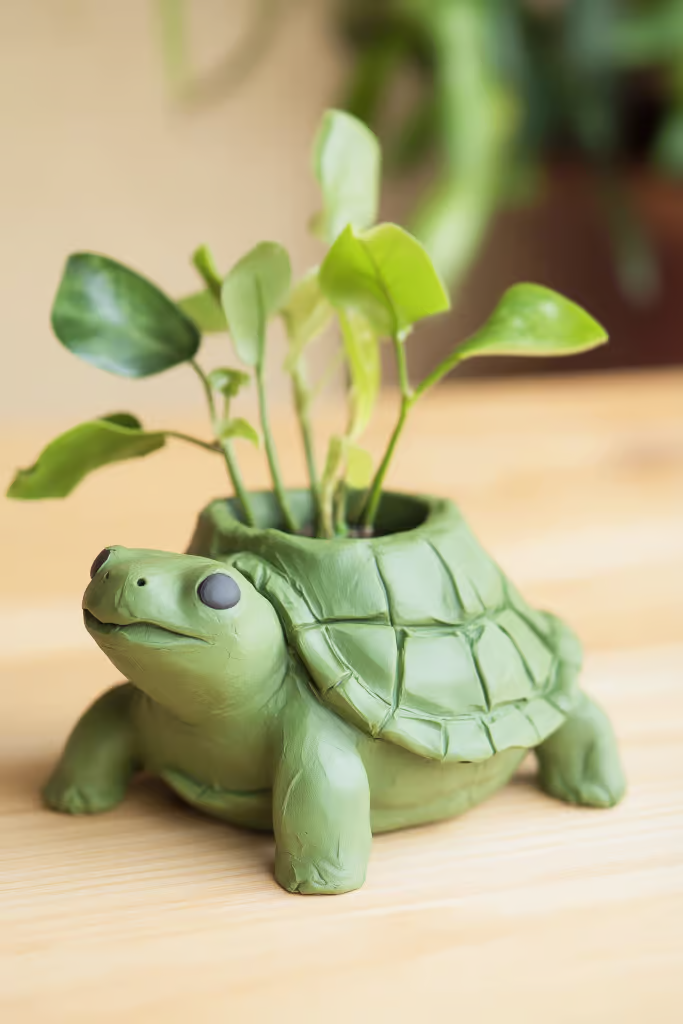
6. Bulk Out with Aluminum Foil
Clay is heavy, and using too much can lead to cracks or long drying times. That’s where aluminum foil comes in handy. Shape the foil into a rough base for your sculpture, then cover it with a thin layer of clay. This not only saves clay but also makes the finished piece lighter and sturdier.
Foil is particularly useful for large or rounded designs like heads, animals, or ornaments. Because the clay layer stays thin, it dries evenly without the stress of thick sections, helping you achieve a smooth and durable finish.
7. Dry Slowly and Evenly
How you dry your project is just as important as how you build it. Place your clay piece on a non-stick surface like wax paper or a silicone mat, and let it air dry naturally. Avoid direct sunlight, heaters, or fans, which can cause the clay to dry too fast and crack.
For thicker projects, cover them loosely with plastic for the first couple of days to slow down moisture loss. You can also rotate the piece occasionally to expose all sides to air. Taking the time to dry your work properly leads to stronger, smoother results.
8. Join Pieces the Right Way
Attaching two clay parts together isn’t as simple as pressing them into place. To create a strong bond, score both surfaces with a tool or fork to make small grooves, then apply slip (a clay-and-water paste) to act as glue.
After pressing the pieces together, smooth the seam with your fingers or tools so the connection blends naturally. This method prevents your project from falling apart as it dries and ensures that the final sculpture holds up over time.
9. Seal for Durability and Water Resistance
Air dry clay is not naturally waterproof, so sealing is essential if you want your project to last. Once the piece is fully dry, sand it lightly and apply a clear acrylic sealant or varnish. Multiple thin coats work best, allowing each to dry before applying the next.
Sealing not only protects your project from moisture but also gives it a professional finish. For outdoor pieces or items that might be exposed to humidity, consider stronger options like resin or waterproofing spray for extra durability.
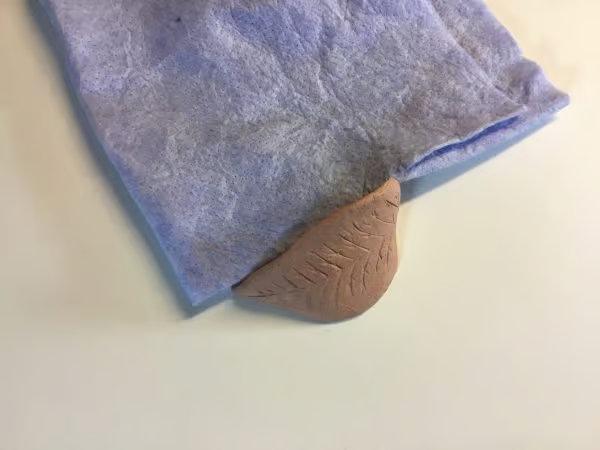
10. Store Clay Properly Between Sessions
Air dry clay can harden quickly if it’s left uncovered, so storage is key. Wrap unused clay tightly in plastic wrap or seal it in an airtight container. If you’re working on a piece and need a break, cover it with a damp cloth and plastic wrap to keep it moist.
For longer storage, place a damp sponge inside the container (without touching the clay) to maintain humidity. If the clay does start to dry, knead in a little water to bring it back to life. With the right care, your clay will stay soft and ready whenever inspiration strikes.